I have been a Lightroom user since version 1 and use Photoshop since version 3 (1994, first version with layers) and always took advantage of keyboard shortcuts in either program, since it is much quicker to move around and get work done. I once visualised my mouse movements over 9 hours, and this is what it looks like:

You can see that I didn’t move over the menu area very much often.
Back to the topic: A lot of stuff can be done with the Keyboard in Adobe Lightroom, but invoking plugins is not on the list. Why? Because Adobe doesn’t know which plugins you will have installed. Fair enough.
A feature request that I get quite often is a keyboard shortcut to run LensTagger, which is not possible from the plugin API. But there are of course options to make that work outside of Lightroom. For macOS, there is a built in function that can be used, for Windows you will need to install an external Tool. Let’s start:
macOS
macOS has a very powerful shortcut manager built in to the OS, so for simplicity we will make use of it. I use this since many years and it just works.
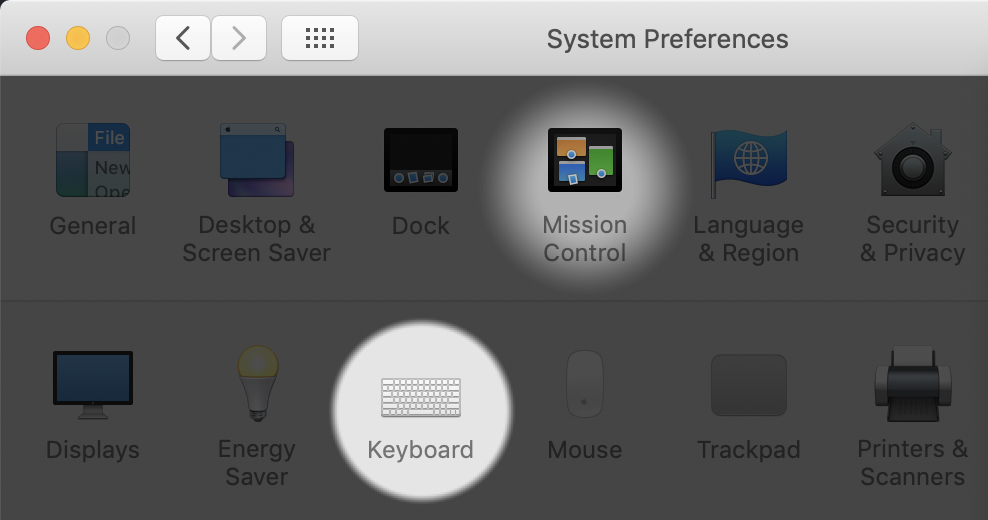
Open System Preferences and navigate to the Keyboard section
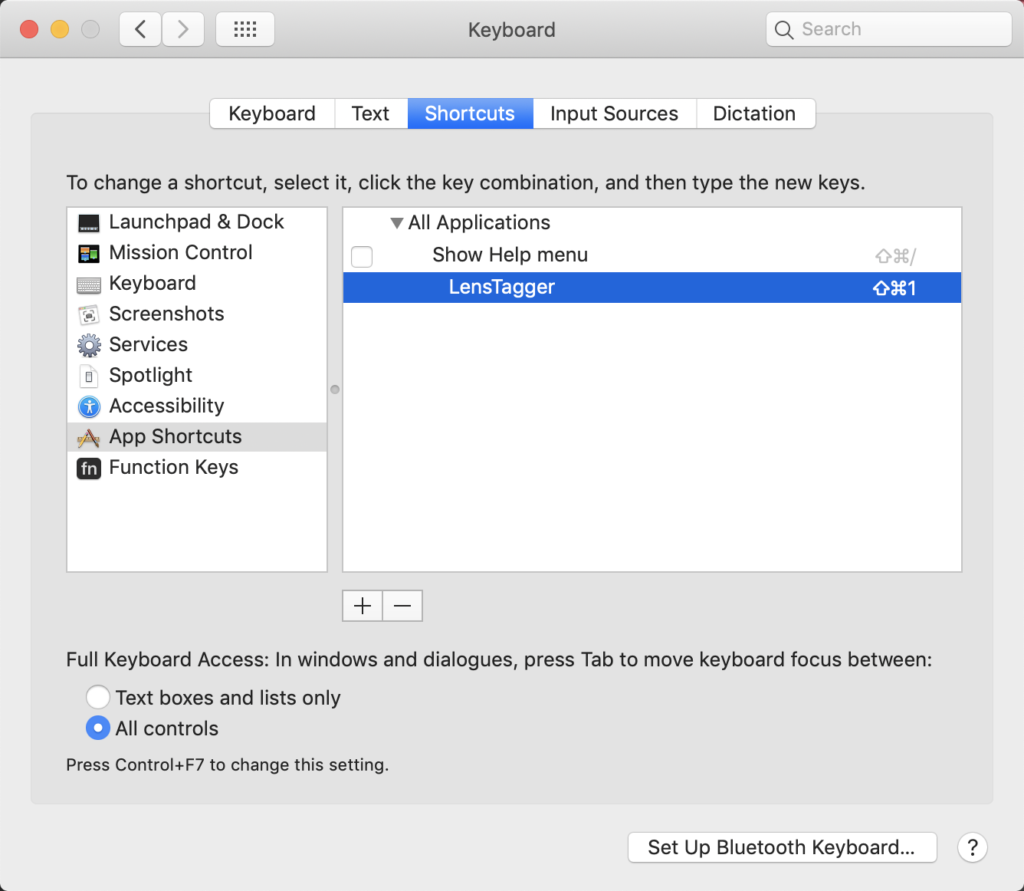
From there get to the Shortcuts tab and select ‘App shortcuts’. As you can see, LensTagger is the only shortcut, that I have configured, because I use BetterTouchTool for all my custom shortcuts, as BTT syncs its config over Dropbox so I have the same config available on all my Macs.
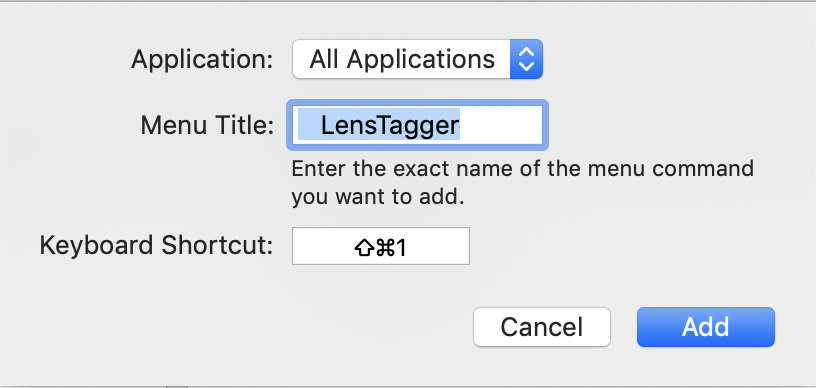
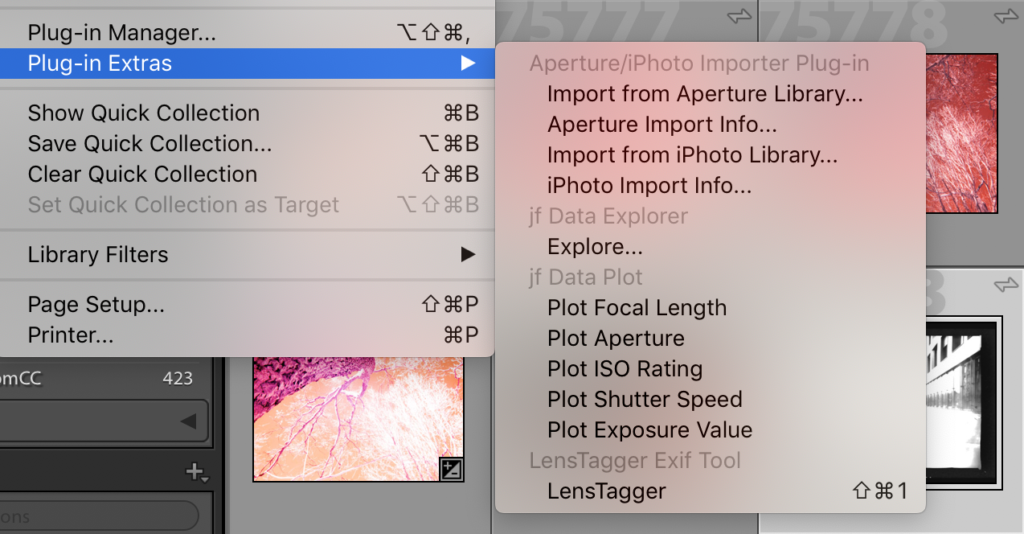
Click on the + button and add your shortcut for LensTagger (or any other plugin). Please note that LensTagger has three spaces in the front. You need to add these spaces for any plugin that would like to use here. If you want to add a shortcut for Jeffrey Friedl’s jf Data Explorer, the Menu Title would be ‘ Explore…’
Then click into the Keyboard Shortcut field and press your desired shortcut. (SHIFT COMMAND 1 in this example).
That’s it. Pretty easy.
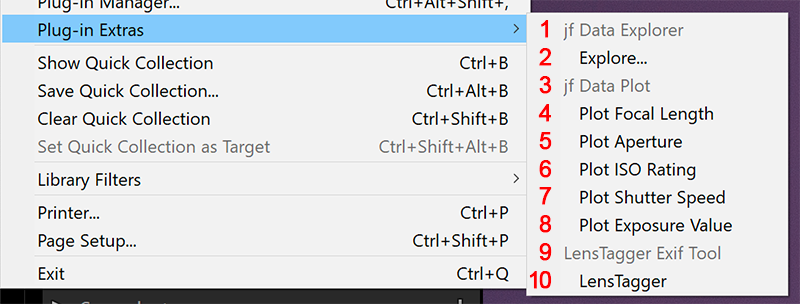
If you then open up Adobe Lightroom, your shortcut will be shown in the menu, so you always have reference.
Windows
Sadly, Windows does not have a built in feature to create shortcuts for the menu system, but the whole menu system is already accessible via the keyboard by default. If you have an english version of Adobe Lightroom, opening LensTagger from the keyboard only requires the press of the following key combinations:
[[ALT]+[F]], [U],[ENTER],[L]
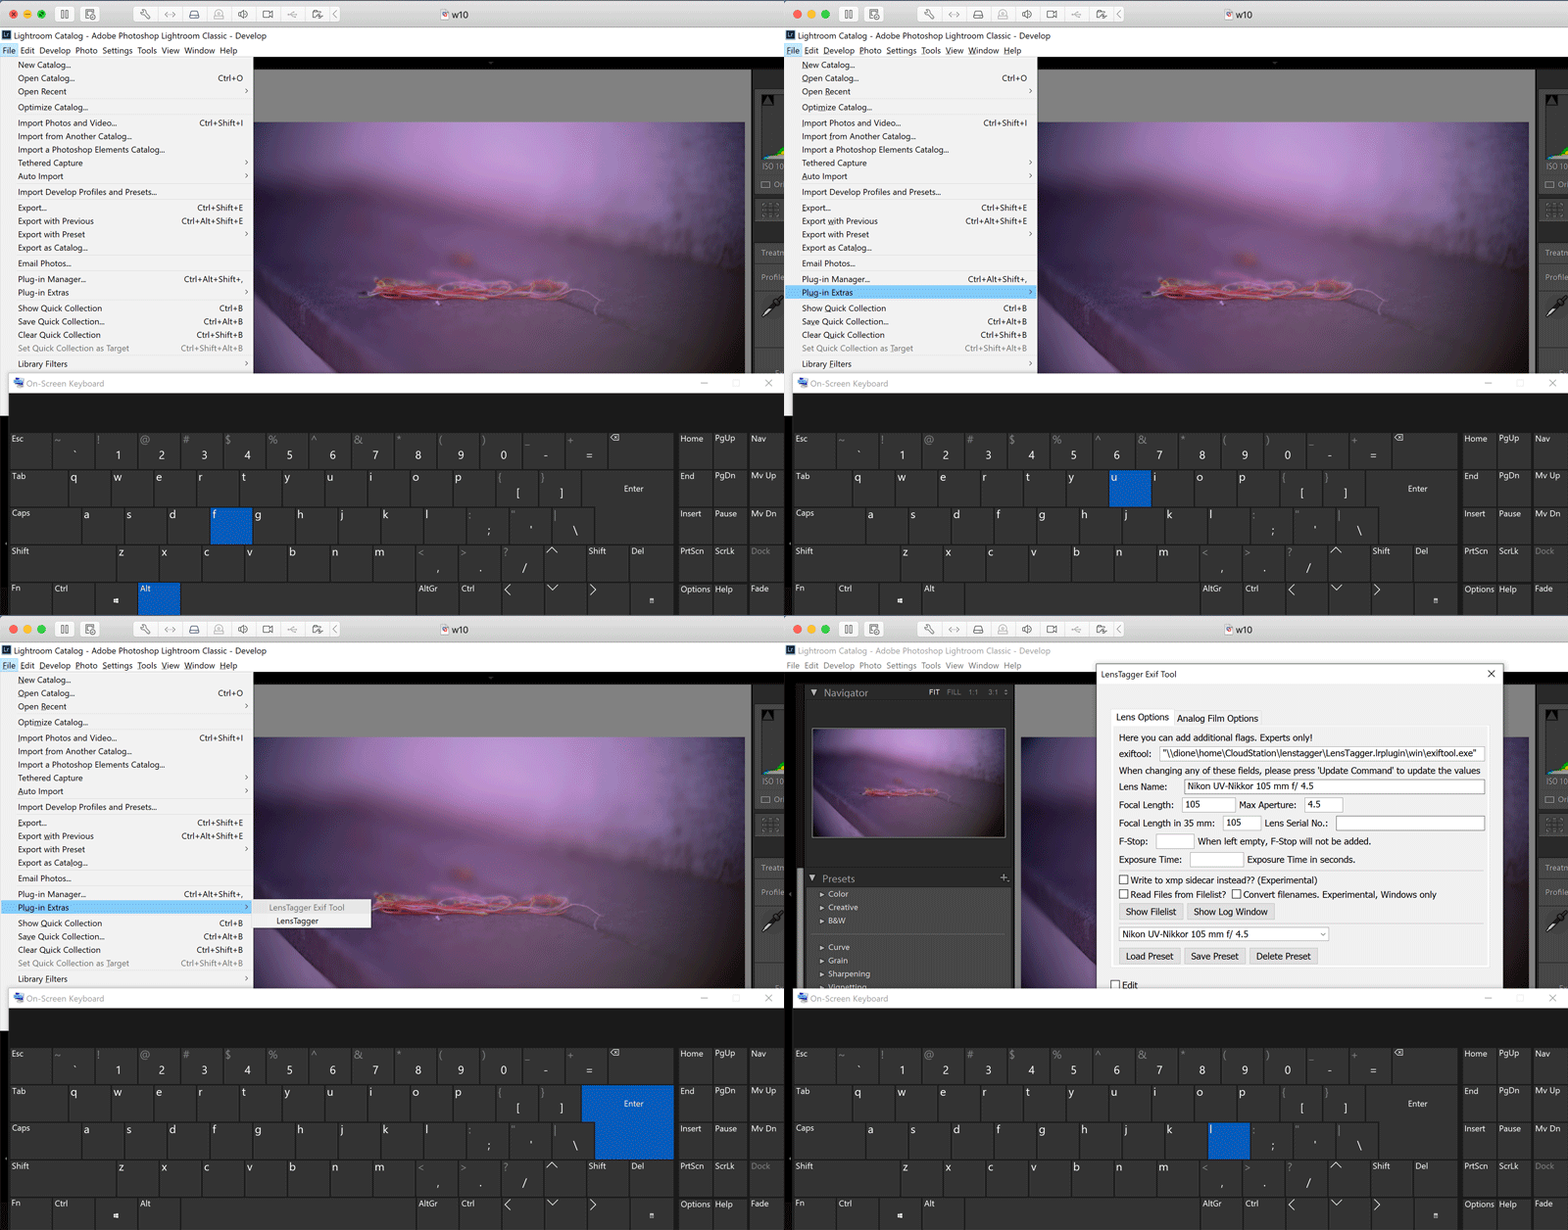
Not very Intuitive. It also Depends on your language of Adobe Lightroom, so if you have a German Installation, the sequence changes to [[ALT]+[D]], [Z],[ENTER],[L]
It also requires you to use both hands to execute the “shortcut”
So the other day I had another request for a shortcut, but for Windows. I started digging out a solution. And here comes AutoHotkey to the rescue. AutoHotkey is a powerful scripting language for Windows and can be used for a plethora of things. But we will only use 2 lines of code to make this work:
^1::
WinMenuSelectItem, A, , 1&, 23&, 2&
This creates a shortcut for [CTRL+1] and opens the File Menu, moves down 23 steps and 2 steps down in the submenu of “Plugin-Extras”. Voila, LensTagger opens. But what if you have more plugins Installed and the position of LensTagger is different? You can then either install the Full Version of AutoHotkey and change it by yourself, or download my predefined set of compiled shortcuts. All shortcuts use CTRL+1 to open LensTagger. You just have to count, where LensTagger is and use the corresponding exe file. The source file is included in the package.
