For some people, LensTagger might be the first plugin to install, so here is a little manual on how installing it.
- Make sure to download the latest Version from this page, find your download and extract the zip file. If you are using Safari on a Mac, it will most probably already be extracted. If you use Chrome, or Firefox you can extract it buy simply double-clicking it. On Windows, right click and ‘Extract All’ will do the job.

- Once you have it extracted, it is time to move it to place where you keep all your plugins. I have a ‘Lightroom’ folder inside my main Picture folder where I keep all my plugins, presets and other stuff of Lightroom. This way it automatically gets backed up whenever I backup my Pictures folder. On Windows I suggest you to create a Lightroom folder in your My Documents folder or just on any place which you can easily access.

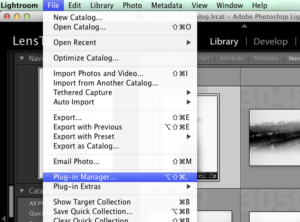
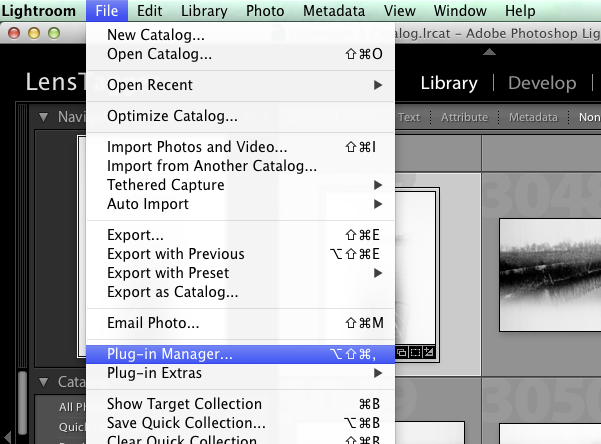
- Startup Adobe Lightroom and launch the Plug-in Manager

- Click on “Add” in the Plug-in Manager

- And browse to the folder where you moved the plugin to and click on ‘Add Plug-in’

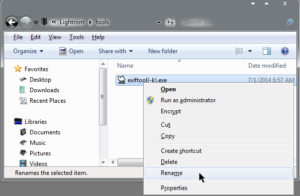
- The Plug-in Manager will load the Plug-in and present you with the configuration screen of LensTagger. If you haven’t done so far, go to the exiftool website and download and install the latest exiftool for your Computer. On Mac OS X it is an Installer Package, so simply downloading and following the installer instructions will make sure you are ready to go. On Windows, extract the zip file, move exiftool e.g. to a tools folder beside your Plug-ins folder and remove the ‘(-k)’ from the filename.


- On Mac OS X, configure the path to exiftool. If you have used the exiftool installer, the path is:
/usr/local/bin/exiftool

On Windows you need to point this value to the path where you have moved your exiftool to.

- Click on ‘Done’. Congratulations, you have now installed LensTagger in Adobe Lightroom.
