Now that you have installed LensTagger, it’s time to add some Lens Data into your precious images. This manual uses Mac OS X to show the various options, but LensTagger looks almost the same on Windows, so it should not be a problem for Windows users to follow this LensTagger Manual.
Overview of the Controls and Options
Open up Lightroom (of course) and select the images you want add data to. Switch to the Library Module and select some images.
IMPORTANT: Before doing anything to your images, you want to save the current Metadata to the files, so hit CMD+S (CTRL+S) to do this.
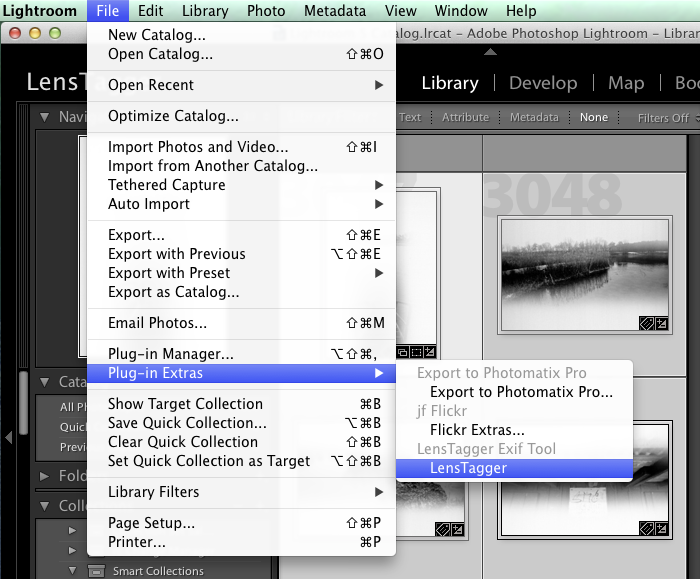
Then point to File -> Plug-in Extras and choose LensTagger
LensTagger will present you with a warning to make sure that you have saved all your Metadata before you proceed.

After pressing OK, LensTagger will show up with some Lens-data pre-filled in. If you have used LensTagger before, the previous values will be shown.

The options explained:
Tab 1 (default Tab): Lens Options
exiftool: Here you can set additional flags to exiftool. Please only use when you are familiar with exiftool, I am not responsible for any data loss if you use those advanced options.
Lens Name: Pick the Lens name. I suggest using the full name of a Lens as from Nikon/Canon/Olympus/Whatever product catalogs. This will make it easier to find pictures made with this particular Lens in the Flickriver Lens search or on Pixel-Peeper.
Focal Length: the actual Focal Length written on the Lens. If you are using a Full Frame 20mm Lens on a MicroFourThirds or any other APS-C crop camera, write 20mm here. Lightroom will automatically calculate the equivalent Focal Length.
Max Aperture: The Maximum Aperture of this Lens. For variable Aperture Zoom Lenses write the range, e.g 3.5-5.6
Focal length in 35mm: on some digital Leica Cameras (e.g. M8) Lightroom will not correctly calculate the correct FOV for non 6-bit encoded Lenses. If you experience this on your files, please use this option.
F-Stop: The actual F-Stop of the selected pictures.
Exposure Time: Shutter Speed in seconds for the selected pictures. Mostly relevant for scanned negatives, but can also be used to ‘correct’ exposure times in Timelapse sequences.
Write to xmp sidecar: This option will not touch the original image file, but will write all EXIF data into the XMP sidecar file that Lightroom creates.
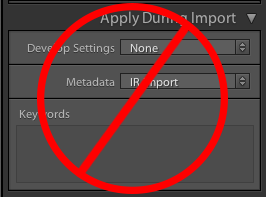
There are some issues when you are using a Metadata import preset while importing pictures, so I do not recommend using them. All Metadata presets can be easily applied after the current import. If you do use an import preset, please make sure to save your Metadata before using LensTagger, or tick the ‘Write to xmp sidecar’ option.
Read Files from Filelist: As of Version 1.7.0 you have the possibility to apply EXIF data to 1000+ pictures in one go on Windows. Mac OS does not suffer from the ~8000 character limit on a command line.
Show Filelist: Opens the Filelist in Textedit on a Mac and Notepad on Windows. Please do not make changes to this file, as they will get overwritten by LensTagger. It can be used for documenting changes and helps in case of errors from exiftool to inspect filenames.
Show Log Window: Opens the logfile of exiftool while it is running. On Mac OS it uses the Console.app supplied with Mac OS, for Windows I included Tail.exe inside the plugin for inspecting the logfile. The logfile can be used in case of support reasons.
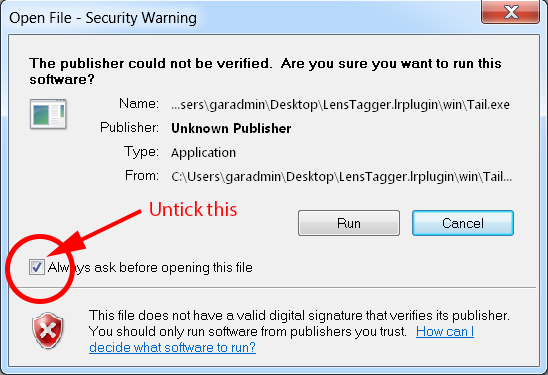
If you press ‘Show Log Window’ for the first time on Windows, you might get a Warning if you are sure about running this file, please untick ‘Always ask before opening this file’ to get rid of this screen every time you push the button.
Preset Name: If you have a lot of different Lenses that you need to tag, you will find it helpful to save Presets for any Lens you want to Tag.
Load Preset: Loads a Preset from the Preset Dropdown and fills in all saved data from this Preset. After loading a Preset, please press the ‘Update Command’ Button below the Edit Window.
Save Preset: Saves any filled in field into a Preset that can be recalled later.
Delete Preset: Deletes the current Preset. Does not clear the fields.
Export Presets: This Function is currently not implemented.
Edit: Ticking the Edit checkbox activates the editing window so you can small changes or copy the command for uses outside of Lightroom. Changes made here will not be saved into Presets.
Run Command: Runs exiftool with the selected options. While exiftool is running, you can press on ‘Show Log Window’ to see the current process.
Cancel: Dismisses the LensTagger Window without saving the filled in data.
Close: Closes LensTagger and saves all filled data to the Lightroom Configuration File (see http://helpx.adobe.com/lightroom/kb/preference-file-locations-lightroom-4.html)
Tab 2: Analog Film Options
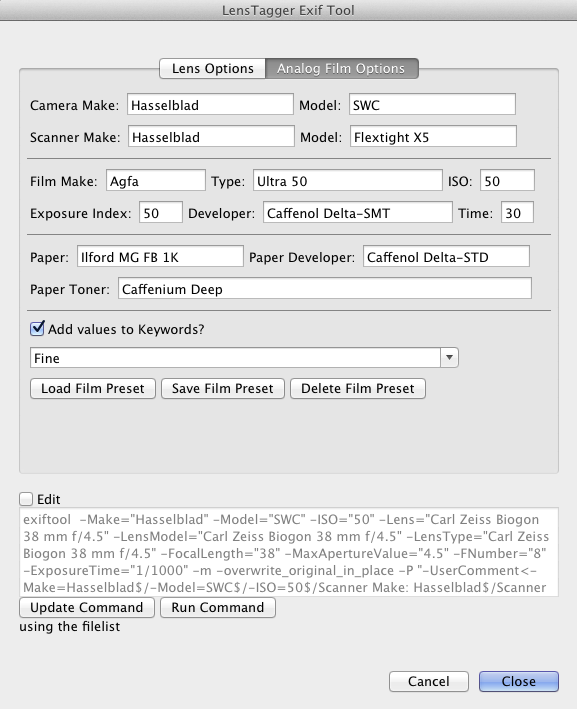
Camera Make: Manufacturer Name of the used Camera
Model: Model Number/Name of the used Camera
Scanner Make: Manufacturer of the Scanner (This data gets written into the UserComment field)
Model: Model of the Scanner (This data gets written into the UserComment field)
IMPORTANT: Most scanning Software will use the Camera Make and Camera Model fields to record the Scanner make and model. If you wish to keep this Information, please do not fill in Camera make and Model and use Keywords instead for identifying your Camera. If there will be enough people on Flickr using analog Cameras and using LensTagger, the chances are good that Flickr will create a specific camera page for this particular Camera. (Not confirmed, though)
Film Make: Manufacturer of the used Film (This data gets written into the UserComment field)
Film Type: Name/Type of the Film (This data gets written into the UserComment field)
ISO: Box Speed of the used Film
Exposure Index: At what speed the Film has been exposed (This data gets written into the UserComment field)
Developer: Used Developer name (This data gets written into the UserComment field)
Time: Development Time (This data gets written into the UserComment field)
Paper: Paper Type/name used (This data gets written into the UserComment field)
Paper Developer: Paper Developer used (This data gets written into the UserComment field)
Paper Toner: Paper Toner used (This data gets written into the UserComment field)
The Preset section works the same as in the Lens Section, but only fields from this Tab will be saved.
About Analog Development Data saved in UserComment
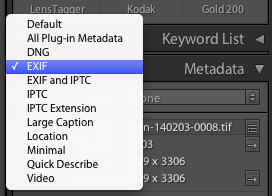
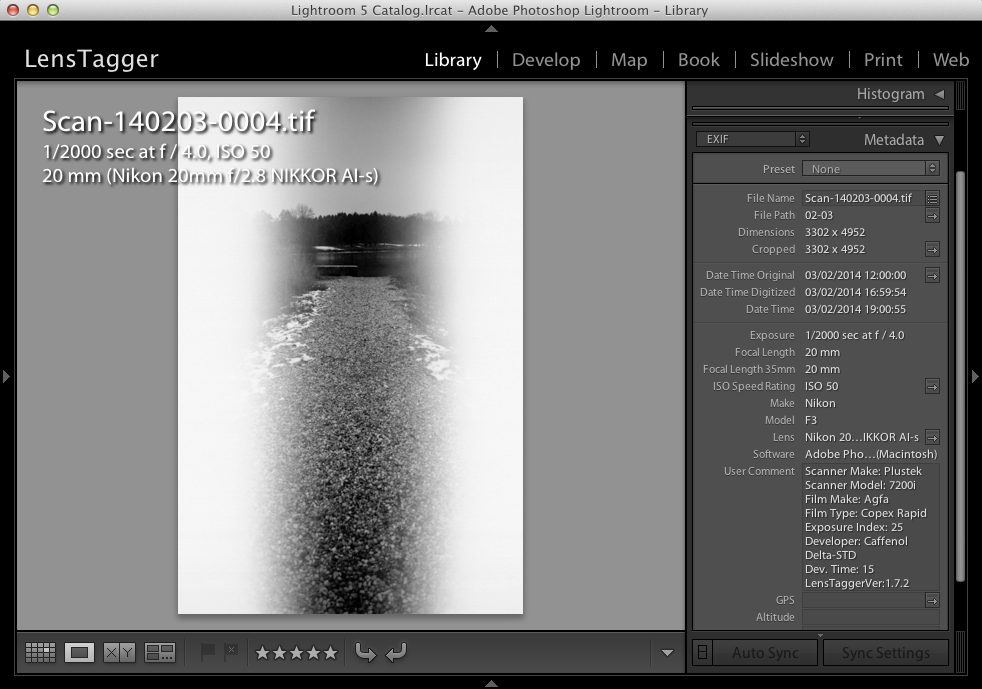
By Default Lightroom does not show the UserComment field in the Library View, you need to switch at least to the EXIF View to show this additional data

Filling in Fields and Running LensTagger
Now that you know what all those options do, It’s time to get this data into your Pictures. Fill in all desired fields and Press ‘Update Command’. This will construct the command-line required for exiftool and show it in the Edit Window.

When a field is left empty, it will not be added or overwritten/cleared in the EXIF data. This way you can edit files in chunks, first adding all the general data on all selected Pictures and then narrowing them down to specific EI/Aperture/Shutter Speed Values.
When you are ready, hit ‘Run Command’ and exiftool will start in the background and will begin adding all information into your Pictures. You can watch the process by opening the Log Window.

When exiftool has finished, LensTagger will show this:
![]()
So hit ‘Close’ and you are back in the Library Module of Lightroom.
To make the changes visible in Lightroom, you now have to re-read the Metadata from the changed files. Right click into the still selected Pictures and choose Metadata -> Read Metadata from Files

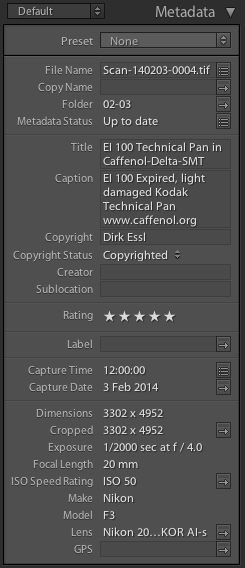
The Information that you have just added will now be visible in the Metadata section of the Library Module
Great! you have now all relevant EXIF data in your Pictures.

You can as well now create Smart Collection based on almost every field that you have added.

Or include all your analog Pictures to make Plots with Jeffrey’s “Data Plot” Lightroom Plugin
If there is something missing or unclear, please contact me.